Walling's Stair Step Method - Shopify (Part 3)
Introduction
Let’s get into Shopify development! I guess essentially before building any app design, we need to understand how Shopify even works, at least the development environment itself. Another question is whether I should set up a shop myself to test all these things that I am developing. But probably there are existing test shops out there.
Development Environment
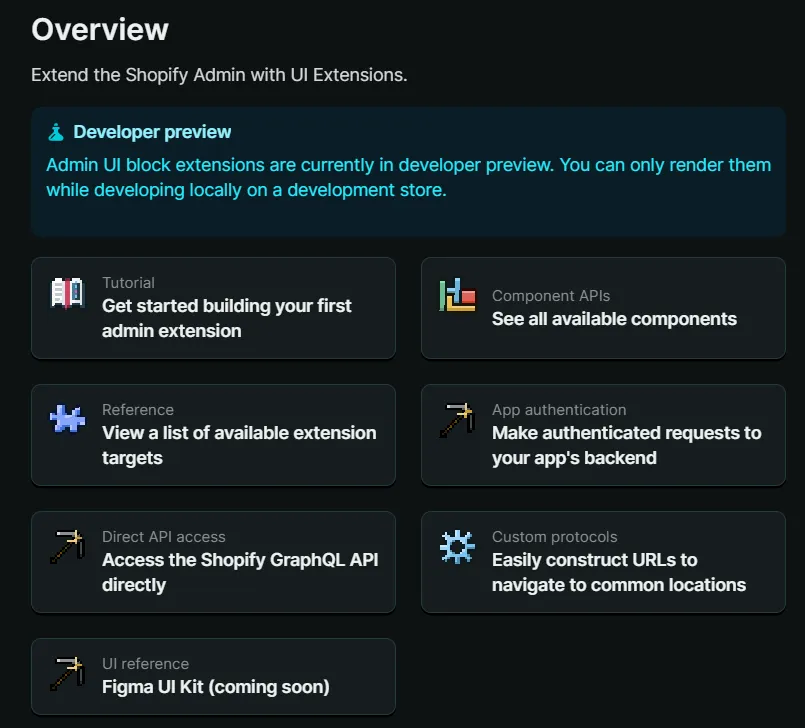
There’s a neat little site for dev docs. After creating a partner account, the design, look and feel of the docs seem pretty refreshing. There’s even an option for a development store. Going through the motions, using the Shopify CLI is a bliss to start with.
The docs also help you develop a tiny QR app to show you how development on Shopify is done. I think it’s wonderful. The whole tutorial is charming and results in a somewhat useful app.
Moreover, I love the design language of the tiny icons everywhere in pixel art style. Considering the docs are for developers, the art connects nicely to the whole playfulness of the development experience.
Extending The Product Admin Page
Thanks to the amazing docs, I have a vision how to get this done.
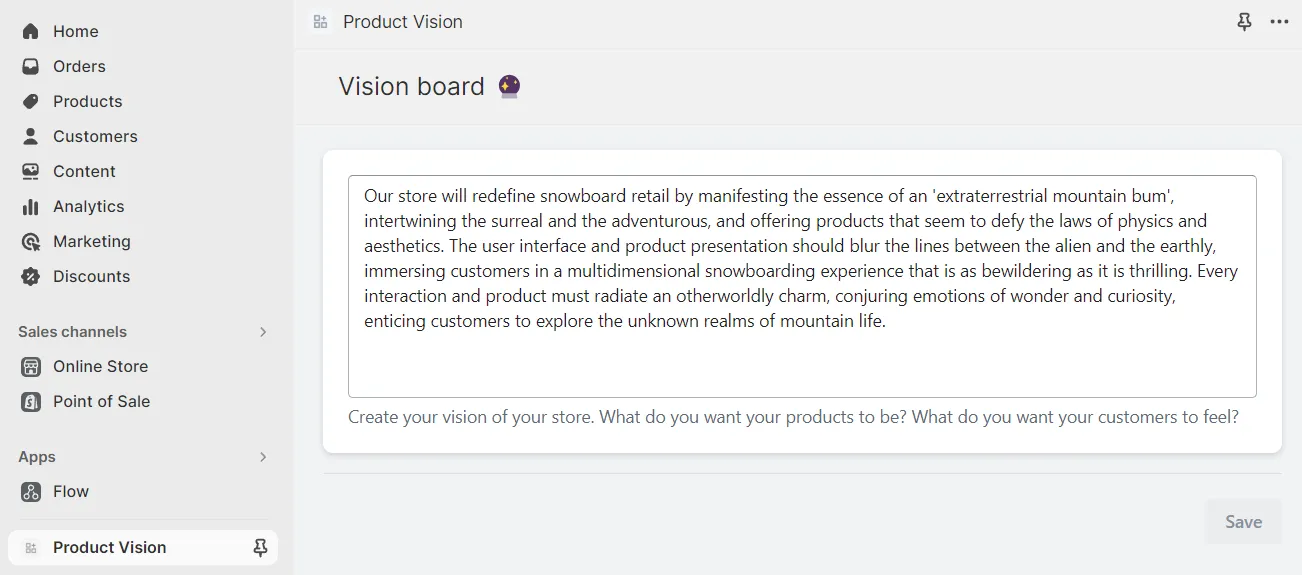
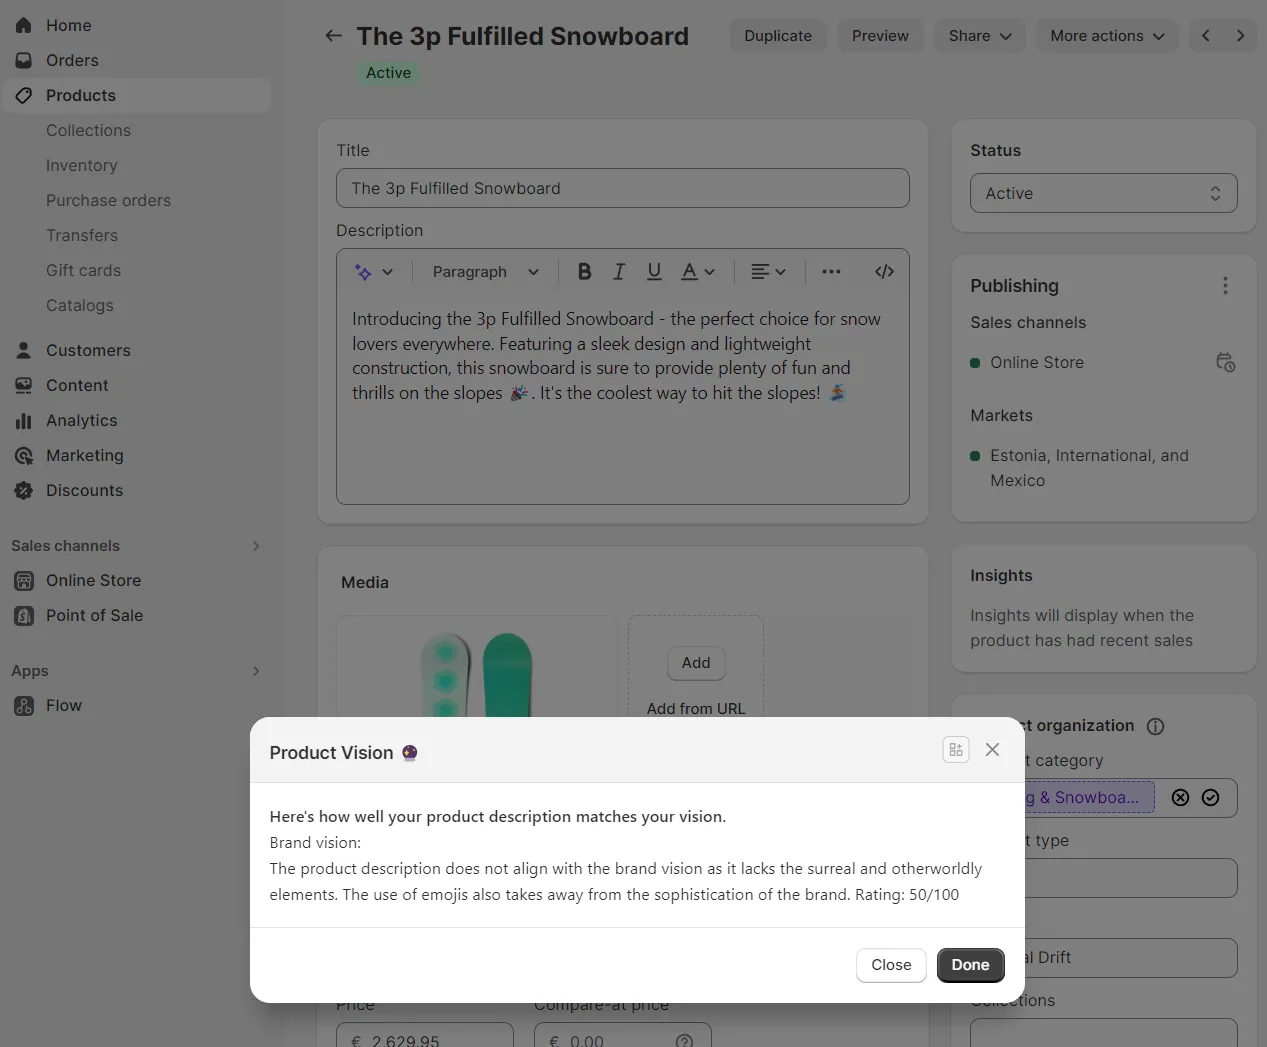
So I am trying to get to the point where I can give analysis and feedback on the suitability of the product text given the described brand image. So in essence, there should be two aspects to this. One is the app page itself where you can describe the brand image in your own words. And the other part is a button on the product management page that gives you feedback on how well the product text is aligned with your vision. Unfortunately I can only do this functionality as a modal that pops up from the button at this point. There is UI block extension functionality, but that is in beta right now, and since I want to get something out fast, then this probably won’t do. The modal is easier to start with anyway.
Because I can set a placeholder brand vision copy while I am testing things out, I think it’s probably good to start off with the modal part and connecting to ChatGPT that would tell me something decent about the situation.
Admin actions, the mechanism that helps me extend this area, have their own tutorial which I won’t copy word for word anymore, but rather use it to immediately get to the solution I actually want. So, I simply used it as a base template and started building on it. To my surprise, it appears that they have templates for each of these areas of Shopify. How convenient!
Findings Through Suffering With Debugging
The Debugger
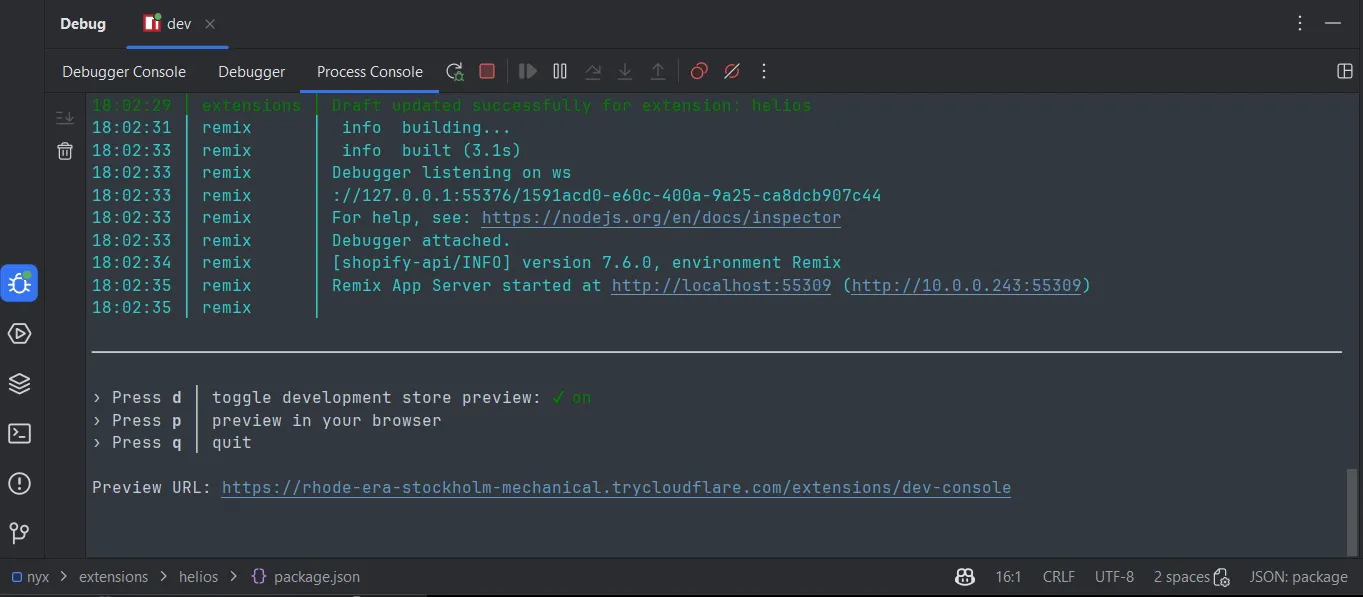
Because Shopify uses Remix to let people build apps on its system, there are intricacies with Remix as well. You don’t have to use Remix, but that makes things more streamlined. I think because the app is somewhat embedded within the store rather than being standalone, then debugging the running app is an odd experience. You can however debug the frontend pretty well in most cases.
Even though the internet did not help me much in finding ways to debug the backend of this
because it is being deployed in a weird way into the Shopify environment, the true
answer was sitting in front of my nose. Because the backend is being tunneled, that means
I can literally just debug the npm run dev from IntelliJ directly.
Debugging the backend wasn’t all without its faults though, as the IntelliJ UI seems to flicker a lot, and sometimes gets randomly disconnected from the debugger. But in the cases where you really need it, I guess it does its job. It is just not something you’d like to spend most of your days working with in this stage.
Working With Databases
The first major issue I stumbled on is that my Prisma upsert does not seem to be working, but in order to analyze this I need to understand what’s the actual state of the variables going into the query in the backend. Before I got debugger working, this seemed pretty difficult to figure out.
Another thing I discovered is that through the UI extension you can do normal database
queries using the admin object for product information and the sort, but what you cannot
do is do queries against the tables you have created yourself with the Prisma conf. These
are out of scope in any meaningful way, and you have to make a request against the backend
for this information.
In Shopify’s database schemas it seems like the identity key id isn’t actually a number
like it is in everywhere else, but rather it is essentially a gid, a global identifier.
The numerical identifier still exists within a gid, but it’s only the last part of it
before additional parameters, but
is preceded by the context in which that number exists. So in all Shopify’s tables
when you query for, or use in your queries, the id, what you will see is more of a
URL-like global resource identifier that looks like this: gid://shopify/InventoryLevel/123?inventory_item_id=456.
Connecting The UI Extension To The Parent App
Initially, it seemed like the UI Extension is almost completely separate from the encapsulating app, with no
information moving between them. In none of the documentations it said how to actually make these communicate
with each other. The one example that was used in the official documentation was a hacky solution extending the
product metadata fields to pass extra information about the products. That’s a way that works because both the app
and the UI extension can use admin queries.
So what I had thought is “hey let’s just have a backend for the UI extension” that communicates with the database to get the necessary information. But seems like the way Shopify deploys the UI extension is again different from the Remix-style structure, so there’s no routing or controllers you can build for the UI extension. So it seemed like to actually get a backend for the UI extension, I had to somehow be able to connect to the parent app.
Then I perused through pages of Slack messages in the Shopify Partners Slack group with related search terms and found a link to some announcement saying that now when you make requests to the app’s backend from other the authentication tokens are automatically passed, so you can easily create requests without a hassle. But then I had to figure out what’s the easiest way to make these backend requests, and I just experimented with URLs, and it does follow a very clear style, just following the Remix routes for its path creation.
CORS
Once I got the requests basically running, I was immediately hit with a CORS error. This is because the extension is being deployed to a different domain than the app is hosted at.
Access to fetch at [...] from origin [...] has been blocked by CORS policy:
Response to preflight request doesn't pass access control check:
No 'Access-Control-Allow-Origin' header is present on the requested resource.
If an opaque response serves your needs,
set the request's mode to 'no-cors' to fetch the resource with CORS disabled."
What I had found is that in the controller method the authenticate method’s response actually has a cors closure
you can use to wrap your response in to fix that problem. However, that seemed to only work for me in the simplest
of responses. Whenever the response structure was even a bit more complex, it seemed to start failing again for some unknown reason.
What fixed it was simply adding the header manually myself. Now the extra cors wrapping might be overkill, and
allowing literally all origins for this request might be some kind of security issue in the long run, but that is
okay for now. This header has to exist on every endpoint’s response that you want to call cross-origin.
return cors(
  json(
    {
      text: chatGptResponseText,
    },
    {
      headers: {
        "Access-Control-Allow-Origin": "*",
      },
    }
  )
)
Lastly, any time some exception is being thrown in that controller, these errors must also include that header, otherwise all you’ll see is that CORS error again without any more useful information for you to fix the issue. So in essence it’s better to at least wrap the whole controller method’s insides in a try-catch block in order to pass on the error message correctly.
Other Notes
- For some changes you need to do deliberate toml config pushes from the terminal, as they’re not automatically picked up. This includes your app name’s change.
- UI extensions have their own UI component libraries. That means e.g. the
Textcomponent is different in the Admin extension, Checkout extension, and different in Polaris. By different I mean that it’s a different interface. - There are a lot of different libraries for calling ChatGPT completions, and the documentations aren’t properly up to date.
This is how the app looks like so far. There has been a lot of back and forth in terms of how long the response text should be, and I cannot seem to get it to a good place, but for now I have been putting focus on the 100 point score instead of detailed guidance what the customer should do.
Next Up
As the app’s MVP got done, it needs some polish and figuring out how to deploy it and get it visible to everyone.